A cluttered garage isn’t just messy, it’s a safety hazard and a productivity killer. When wrenches hide behind paint cans and drill bits scatter across workbenches, finding the right tool becomes a ten-minute treasure hunt. Tool wall storage solves this problem by moving your most-used items into organized, visible locations where they’re easy to grab and return. Whether you’re setting up a serious workshop or just need wall tool storage ideas that work in a modest garage, the right system saves time, protects your equipment, and makes every project run smoother. Let’s explore practical solutions that actually work for real DIYers.
Table of Contents
ToggleKey Takeaways
- Tool wall storage transforms cluttered garages into organized, efficient workspaces by moving frequently-used items to visible wall-mounted locations that save time and floor space.
- Pegboard and slat wall systems are the most versatile tool wall storage solutions, with pegboard requiring 1/2-inch spacers for proper airflow and slat walls offering superior load capacity for heavy power tools.
- Always mount storage directly to wall studs using 3/16-inch lag bolts, as mounting to drywall alone risks tool loss and safety hazards—use a stud finder to locate studs spaced 16 inches on center.
- Organize your tool wall by height and frequency: eye-level storage for most-used tools, lower shelves for heavy items like compressors, and upper areas for lighter consumables like fasteners.
- Regular maintenance including quarterly bolt checks, annual pegboard cleaning, and proper tool acclimation prevents rust and keeps your wall storage system functioning safely for years.
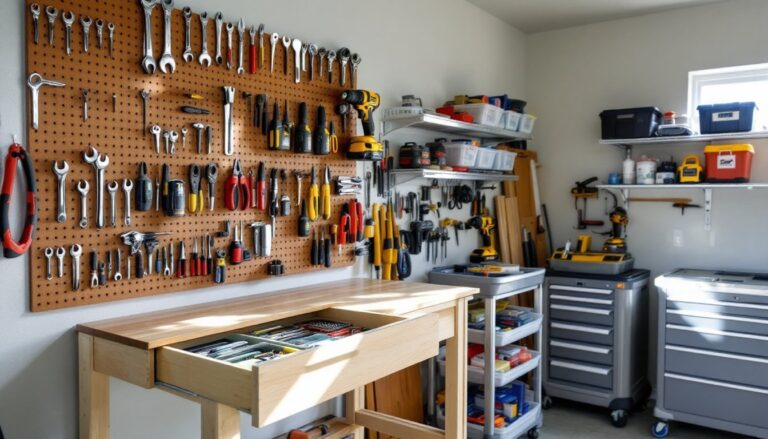
Why Tool Wall Storage Matters for Your Workspace
A disorganized workspace isn’t just frustrating, it costs you money and safety. Tools left loose on benches get damaged or go missing, and scrambling to find a wrench in the middle of a project kills momentum. Wall-mounted storage keeps frequently used tools within arm’s reach, reducing project downtime and making your space feel twice as large.
More importantly, vertical storage prevents tripping hazards and keeps cords from becoming entanglement risks. Heavy tool chests consume valuable floor space that could be used for assembly or finishing work. When you move tools to the wall, you reclaim that real estate. Plus, visibility matters: when tools are in plain sight, you’re more likely to return them to their spot, not leave them scattered. A well-organized tool wall also makes your workspace look professional and saves your knees and back from constant bending.
Popular Tool Wall Storage Solutions
Pegboard Systems and Variations
Pegboard remains the workhorse of DIY tool storage. A standard 1/2-inch pegboard (typically sold in 4×8-foot sheets but easily cut to fit) mounts to wall studs with 1/4-inch lag bolts. The beauty is its versatility: pegs, hooks, and baskets let you customize the layout as your tool collection grows.
Don’t install pegboard directly against the wall, air needs to circulate behind it, and your hooks won’t sit flush if you do. Use 1/2-inch spacers (wooden shims or metal standoffs) between the pegboard and studs to create air space. This prevents moisture buildup and allows hooks to fully catch. Paint or stain your pegboard first: it’s far easier before mounting, and a coat of finish protects against dust and humidity.
Beyond traditional pegboard, consider slat wall systems (also called rail systems). These use grooved panels that accept specially designed hooks and brackets, and they handle heavier loads than pegboard, crucial if you’re storing a circular saw or impact driver. Slat walls cost more upfront but give a finished, modern appearance.
Wall-Mounted Tool Racks and Magnetic Strips
For frequently grabbed items, nothing beats a wall-mounted tool rack. Heavy-duty steel racks bolt directly to studs and can hold impact drills, orbital sanders, and other mid-weight power tools without flex. Measure your stud locations with a stud finder (a critical investment if you don’t own one) and use 3/16-inch lag bolts into 1-1/2-inch studs, never into drywall alone.
Magnetic strips deserve mention for hand tools and bits. A 1/4-inch-thick neodymium magnetic strip mounted at eye level keeps your metric wrenches, pliers, and chisels instantly accessible and dust-free. These work especially well above a workbench. Just ensure the strip is rated for the weight of your tools: a typical 18-inch strip holds roughly 50 pounds of steel.
If you’re setting up a serious workshop, many DIYers combine systems, pegboard for mid-weight tools, wall racks for power tools, magnetic strips for precision hand tools, and small shelving for consumables like fasteners and sandpaper. Your workshop setup guide should reflect which tools you use daily.
Planning and Installing Your Tool Wall Storage
Assessing Your Space and Tools
Before you buy materials, take stock. Lay out your tools and measure each one, a 7-inch angle grinder needs more vertical space than a drill. Sketch your wall to scale and draw rough placements. This prevents the frustrating discovery halfway through mounting that your circular saw won’t fit in its designated spot.
Check wall construction. If your garage has nominal 2×4 studs (actual dimension 1.5 inches), they’re spaced 16 inches on center. Use a stud finder to mark them: mounting to studs alone means you can safely hang 40- to 60-pound loads. If you must hang something between studs, use heavy-duty drywall anchors rated for your load, typically 20 to 30 pounds maximum. Never rely on toggle bolts for something that might vibrate or shift.
Consider your electrical layout. Running wall storage behind existing outlets or near appliances creates a fire hazard if a tool cord gets pinched. Leave at least 12 inches of clearance around any outlet or switch. If your wall temperature fluctuates (uninsulated garage walls in cold climates), allow tools to acclimate to room temperature before storing them: condensation can rust blades and chuck mechanisms overnight.
The height of your storage matters too. Eye-level storage holds your most-used tools. Store heavy items (nail guns, compressors, lead acid batteries) lower and lighter items (bits, fasteners, coiled cords) higher. Popular Mechanics covers tool storage setups that fit various workshop sizes, from 200-square-foot garages to dedicated shops.
Installation Steps
Installation itself is straightforward but demands precision. Mark stud locations with a pencil, then measure twice and drill your pilot holes through pegboard or mounting brackets with a 1/8-inch bit, undersized holes prevent splits and keep fasteners tight. Tighten lag bolts firmly but don’t crank them: stripping threads wastes the bolt’s holding power. Use a level on pegboard to ensure hooks sit true, even a 1/4-inch tilt makes hooks stick or slide.
After mounting, resist the urge to load everything at once. Add tools gradually, watching for any sag or movement. Small adjustments now prevent catastrophic failure later.
Styling and Maintenance Tips
A functional tool wall doesn’t have to look utilitarian. Paint your pegboard a color that complements your garage floor or trim. Dark gray, charcoal, or deep blue hide dust and grease better than white and provide good contrast for colored tool handles. Organize tools by category, power drills clustered together, hand tools in another zone, finishing supplies in a third. This isn’t just attractive: it trains your brain to know where everything lives.
Label sections if you share your workspace or have helpers. A laminated label maker costs under $20 and prevents someone from returning a circular saw to the “hand tool” hook. For wall tool storage ideas that age well, keep hooks and brackets visible but orderly. Avoid the temptation to cram every surface: empty pegboard space actually looks intentional and gives you room to add tools without rearranging.
Maintenance keeps your system working. Check lag bolt tightness quarterly: vibration from nearby machinery can slowly loosen fasteners. Wipe pegboard annually to prevent dust buildup, which can cause tools to stick in hooks. Magnetic strips need a light pass with a soft cloth: debris interferes with magnetic grip. For tools you store vertically (like clamps), check that no water pools in the handle cavities, trapped moisture breeds rust.
If your collection grows, you don’t have to rebuild the wall. Most pegboard systems expand upward or sideways by adding more sheet sections. Ana White’s DIY projects include custom shelving and tool racks you can adapt to your exact space and style. The beauty of wall storage is flexibility, adapt your system as your workshop evolves.