Harbor Freight tools are a DIYer’s secret weapon, affordable, reliable, and perfect for someone building a shop on a budget. But here’s the catch: owning more tools doesn’t mean anything if you can’t find what you need when you need it. Tool storage isn’t glamorous, but it’s essential. A well-organized shop saves time, prevents damage, and keeps you safe. Whether you’re working in a garage, basement, or shed, the storage strategy you choose can make or break your efficiency. This guide walks you through practical Harbor Freight tool storage solutions that fit real spaces and real budgets, so your collection stays functional and accessible for years to come.
Table of Contents
ToggleKey Takeaways
- Effective Harbor Freight tool storage prevents rust, damaged tools, and wasted time by keeping your collection organized, accessible, and protected from moisture.
- Maximize wall space with pegboards ($15–$30) or wall-mounted rail systems, grouping tools by function and placing frequently used items at eye level for quick access.
- Invest in drawer organizers and compartment dividers ($10–$20) to prevent small tools from getting lost, and label each drawer to eliminate searching.
- Portable storage solutions like U.S. General tool carts, cantilever boxes, and labeled plastic bins make it easy to transport tools to multiple jobsites or rooms.
- Maintain your organized system with monthly cleanouts, quarterly audits, moisture control, and strategic labeling to keep your shop functional and efficient long-term.
- For small spaces, use vertical storage on walls and ceilings, over-the-door organizers, and under-bed drawers to maximize every inch without sacrificing usable work area.
Why Harbor Freight Tools Need Smart Storage
Harbor Freight’s reputation for value means many DIYers end up with more tools than they originally planned. That’s not a problem, until your 3/8-inch wrench ends up buried under five years of accumulated clutter, and you buy a duplicate because you can’t find the first one.
Harbor Freight tools, especially their U.S. General and Hercules lines, are built to work hard and last, but they demand respect in how you store them. Unlike high-end tools that might justify a climate-controlled cabinet, Harbor Freight’s affordability makes it economical to own multiple variants, different lengths of the same wrench, various socket sizes, specialty bits for different materials. That variety is powerful, but it also creates storage chaos if you’re not deliberate.
Moisture is your biggest enemy in tool storage, especially in unheated garages and damp basements. Metal rusts, plastic grips degrade, and power tool batteries lose charge in cold. Crowded drawers invite dropping, bending, or breaking things. Disorganized shelves mean you work around clutter instead of through it. Smart storage keeps tools dry, protected, and within arm’s reach, which directly translates to faster projects and fewer frustrations.
The good news: Harbor Freight’s own storage line, plus inexpensive wall systems, drawer kits, and portable carts, make this manageable without dropping thousands on cabinetry.
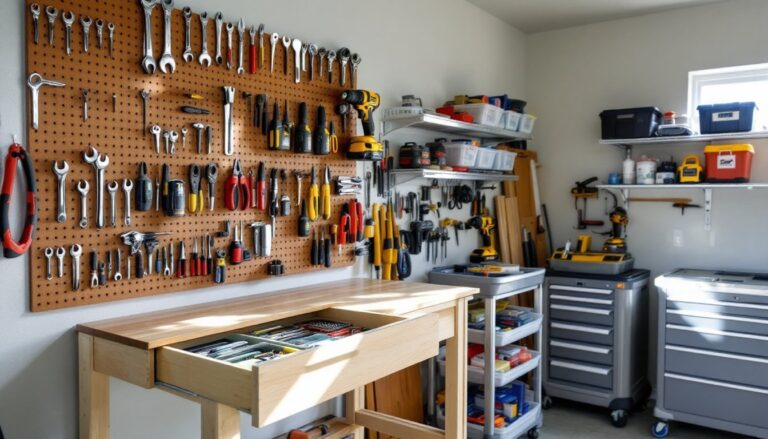
Maximizing Your Tool Wall With Pegboards and Wall-Mounted Systems
A pegboard or wall-mounted rail system is your quickest visual win and the first thing most DIYers tackle. Walls are free real estate, and vertical storage keeps your floor clear for actual work.
Pegboards are the budget classic. A 4-foot by 8-foot hardboard pegboard runs $15–$30 and can hold dozens of hand tools. Pair it with peg hooks, bins, and rail systems (Harbor Freight sells basic kits for under $20). The catch: hardboard warps over time in humid garages, so pick plywood-backed or composite pegboards if moisture is a concern in your space. Mount it on studs or use proper drywall anchors, don’t skimp here, because a loaded pegboard pulling away from the wall is a safety hazard.
Wall-mounted tool rails and track systems (like those sold at Harbor Freight under their storage line) offer a modern alternative. These aluminum or steel rails bolt to studs and accept various hook styles and bins. They’re pricier than pegboard but more adaptable and moisture-resistant. Plan for at least one wall in your workspace: two is better if you’re serious about organization.
Layout tips:
- Group hand tools by function: wrenches in one zone, screwdrivers in another, pliers together.
- Mount frequently used items at eye level: reserve higher shelves for occasional-use gear.
- Mark outlines around tool shapes with tape or paint so tools return to the same spot, it trains your brain and reveals missing items instantly.
- Leave gaps between tool groups for visibility and airflow.
Hang heavier items like impact drivers and socket sets on a dedicated tool holder shelf or industrial brackets rather than small hooks.
Drawer Organizers and Workbench Setup
Drawers are where small tools vanish. A $10–$20 set of compartment dividers or foam organizers transforms a deep drawer from a jumble into a system. Harbor Freight sells basic plastic drawer organizers: upgrade to foam inserts if you own small precision tools or bits that deserve cushioning.
If you’re building a workbench (or repurposing an old one), commit space to three drawer depths: shallow for small hardware and bits, medium for frequently grabbed items like screwdrivers and tape, and deep for less-used specialty tools. Label each drawer on the outside, sounds obvious, but it saves the “which drawer did I put the hex keys in?” moment.
Workbench setup essentials:
- A top shelf or hutch for air tools, batteries, and chargers, keeping them off the work surface.
- A pegboard or hook rail directly above the bench for chisels, screwdrivers, and utility knives (anything you grab mid-task).
- A mobile cart underneath or to the side for projects in progress or materials waiting for the next step.
- Magnetic strips on the bench edge or wall for small metal fasteners and bits so they stick in place, not loose in a drawer.
Drawer space is precious, so prioritize. Do you really need five tape measures? Probably not. Be ruthless about duplicates: keep one of each tool you actually use, then donate or gift the excess. This isn’t about deprivation, it’s about clarity. You’re more likely to reach for a tool you know is there than to hunt through a crowded drawer and settle for something “close enough.”
Keep drawers organized with home organization tips from trusted sources so your system stays functional as your collection grows.
Portable Storage Solutions for On-the-Go Projects
Not every DIYer works in a permanent shop. If you’re tackling jobs across multiple rooms or at other properties, portable storage is non-negotiable. Harbor Freight’s U.S. General tool carts and cantilever tool boxes are workhorses here. A three-shelf cart with lockable wheels runs $40–$70 and holds an impressive amount while staying mobile. Cantilever boxes ($30–$100 depending on size) stack flat in a truck bed and flip open to reveal organized compartments, perfect for taking just what you need to a jobsite.
For small projects (picture hanging, minor repairs, basic assembly), a single tool bag or canvas tote with interior pockets keeps essentials, hammer, drill, bits, screwdrivers, tape measure, corralled and portable. These cost under $20 and fit in a closet or trunk.
For longer gigs, stack two or three plastic storage bins (the clear ones with latch lids, around $5–$10 each) in your vehicle. Label the outside with a permanent marker: Fasteners, Cutting Tools, Specialty Bits. You can see into clear bins without opening them, and they nest flat when empty.
Power tools deserve extra protection. Store batteries and chargers in a small tool box or waterproof bag to keep them dry and organized. A cheap foam insert cut to size prevents tools from sliding during transport. If you own a cordless drill or impact driver, carry it in a dedicated pouch or bag rather than loose: dropping it from a truck bed is a painful (and expensive) lesson.
Maintain a checklist of what goes in each portable kit. Digital notes on your phone work fine, snap a photo of a full kit so you know what should be there when you pack up.
Budget Storage Hacks for Small Spaces
Small-space storage isn’t about buying more, it’s about being ruthless with vertical space and unconventional placement. A 12-foot by 15-foot garage is tight: a single workbench leaves almost no room for a traditional tool cabinet. Here’s how to maximize what you’ve got.
Over-the-door organizers ($10–$20) use dead space inside cabinet doors or closets. Mount them inside your garage entry door or a workshop closet: they hold hand tools, fasteners, and small supplies without eating floor space.
Pegboard on the back of the garage door or sliding closet door turns furniture into tool storage. You lose no usable wall space, and tools stay hidden when the door closes. Use lightweight hooks and bins to avoid throwing the door off balance.
Overhead racks and ceiling-mounted cable systems ($50–$150) store seasonal items, spare lumber, and rarely used power tools. Just ensure proper spacing so you don’t bonk your head, measure carefully and use chains or heavy-duty wire rated for your load. Anything stored overhead should be dry and secure with a secondary safety wire in case the primary mount fails.
Vacuum storage bags compress hand tool rolls, canvas aprons, or fabric organizers to half their size. They’re moisture-proof and stackable, great for tool collections you rotate seasonally or items stored in attics.
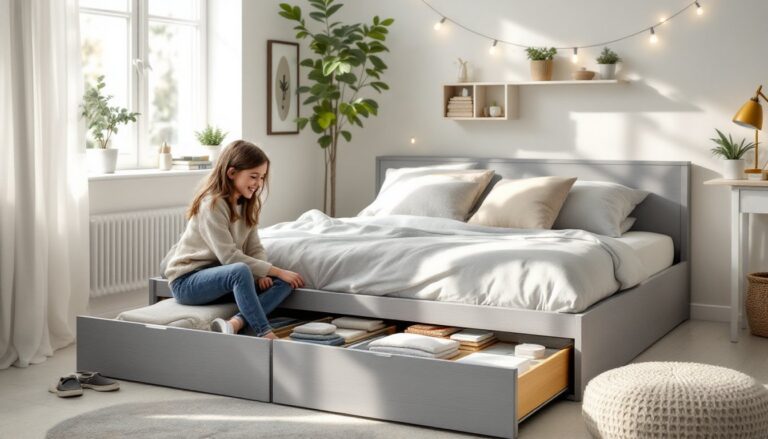
Under-bed storage (if you have a garage loft or workshop bedroom) works for rarely used specialty tools or backup power tool cases. Clear plastic drawers let you see contents without opening them. Desiccant packs keep moisture at bay.
The principle: if you’re not using a tool weekly, it shouldn’t occupy prime real estate. Push occasional-use items to the ceiling, closets, or under furniture: keep daily-grab tools within three feet of your work surface.
Keeping Your Tools Organized and Accessible Long-Term
Storage only works if you maintain it. Dust, rust, and entropy creep in quietly, and before you know it, your organized system looks like it did before you started.
Monthly maintenance: Walk your shop with a trash bag once a month. Pull out sawdust, broken bits, dried-up markers, old receipts, and anything else that doesn’t belong. Takes 20 minutes and prevents the “I’ll deal with it later” pile that grows into chaos.
Quarterly tool audit: Once every three months, inventory what you have. Check for rust, missing pieces, or tools you haven’t touched. If something’s broken and not worth replacing, remove it. If you bought a duplicate of something you already own, relocate the spare to donation or storage. This keeps your active tool collection tight and relevant.
Protect against moisture: Keep a garage organization guide handy for reference on moisture control. Dehumidifiers, silica gel packs, or simple ventilation (cracking a window or running a fan on humid days) protect metal tools. Paint bare metal with a light oil or WD-40 before long storage. This sounds fussy, but it costs pennies and keeps tools serviceable for decades instead of years.
Label everything: Use a label maker or permanent marker on bins, drawers, and shelves. When someone else (or you, six months later) needs a tool, legible labels save hunting time. Include quantities on labels for consumables like bits or fasteners so you know when to restock.
Create a tool inventory spreadsheet or app: If you own dozens of power tools or specialty items, a simple list noting what you own, where it’s stored, and when you last used it prevents the “I think I have one of those” moment. Online tools and step-by-step DIY project tutorials can help you think through your workshop layout if you’re redesigning.
Rotate tools into active use: Tools stored for months lose charge (batteries), seize up (moving parts), or simply feel unfamiliar when you need them. If you own a specialty tool (oscillating multi-tool, stud finder, etc.), use it occasionally or at least power it on quarterly. This keeps your skill sharp and reveals problems before a deadline.
A well-maintained tool collection is an investment in your own efficiency. You’re not just organizing objects: you’re designing a workspace that makes you want to build.
Conclusion
Harbor Freight tool storage isn’t complicated, but it demands intention. A mix of pegboards, wall rails, drawers, and portable solutions handles nearly any DIYer’s setup, and the tools to organize them cost a fraction of what tools themselves do. Start with one wall and one drawer: add portable storage when your collection justifies it. Keep moisture out, label relentlessly, and audit quarterly. Your future self, the one who remembers exactly where the right tool is without hunting, will thank you for the effort today.