A large kitchen island isn’t just counter space, it’s the engine room of your home. It anchors meal prep, hosts family dinners, and stores everything from utensils to small appliances. Whether you’re planning a full renovation or retrofitting an existing kitchen, understanding seating configurations, storage strategy, and layout fundamentals will set you up for a project that actually works. This guide walks you through the decisions that separate a functional island from a beautiful but awkward centerpiece.
Table of Contents
ToggleKey Takeaways
- A large kitchen island with seating and storage improves workflow and adds value when properly sized (3–6 feet long, 2–2.5 feet deep) with at least 42 inches of clearance on all sides for comfortable movement.
- Seating height and spacing are critical: standard barstools should be 24–26 inches tall for a 36-inch counter, spaced 26–30 inches apart center-to-center, with at least 15 inches of overhang for knee clearance.
- Smart storage combines closed cabinets for hidden items, full-extension drawers for utensils and linens, and open shelving for frequently used tools, while toe kicks (4–6 inches) prevent stubbing and create a sleek appearance.
- Island placement works best when centered in the kitchen; test the layout with painter’s tape before committing to ensure traffic flow doesn’t jam appliance openings.
- Utility costs ($1,000–3,000 for plumbing and electrical) can be deferred by stubbing in lines during installation; countertop materials like quartz ($55–120 per sq. ft.) offer durability while butcher block suits light-prep islands.
- Quality hardware and cabinet finishes are worth the investment—use cabinet-grade latex or urethane varnish in satin finish, and select hardware at $8–20 per handle to avoid loosening and oxidation.
Why a Large Kitchen Island Is Worth the Investment
A large kitchen island adds real value to daily life and home resale. Beyond aesthetics, a properly sized island improves workflow. You gain counter space for food prep, seating for informal dining, and hidden storage that keeps clutter off open shelves. The key is ‘properly sized’, a cramped island creates bottlenecks in your kitchen’s work triangle (sink, stove, refrigerator), while oversized islands waste floor space. A functional island typically runs 3 to 6 feet long and 2 to 2.5 feet deep, though larger kitchens can accommodate 4 by 3 feet or more. Before committing budget, measure your existing kitchen layout. You need at least 42 inches of clearance on all sides for comfortable movement: 48 inches is better if two cooks share the space. Kitchen island decorating ideas can further enhance the visual impact once the structural foundation is solid. A built-in or semi-permanent island also prevents the “orphaned appliance” look of a standalone unit that never quite fits the kitchen’s rhythm.
Seating Options That Define Your Island Layout
Seating is where an island transforms from workspace into gathering space. Your choice between barstool, bench, or hybrid seating shapes the island’s footprint and affects storage underneath. Ensure the overhang below the countertop is at least 15 inches, this gives knees clearance and prevents kicking the cabinet base.
Barstool Heights and Spacing Considerations
Standard countertop height is 36 inches, so bar stools should be 24 to 26 inches from seat to floor. For a raised counter (42 inches), use stools 30 to 32 inches tall. Space stools 26 to 30 inches apart, center to center, so diners don’t bump elbows. A typical island seating span of 10 feet can fit three to four stools comfortably. Calculate width carefully: a 24-inch-wide stool plus 26-inch spacing means you need roughly 76 inches for two seats or 102 inches for three. Leave at least 18 inches between a stool’s outer edge and a wall or appliance to avoid trapped legs. Swivel stools work well in active kitchens: fixed stools are more stable and tuck flush when not in use.
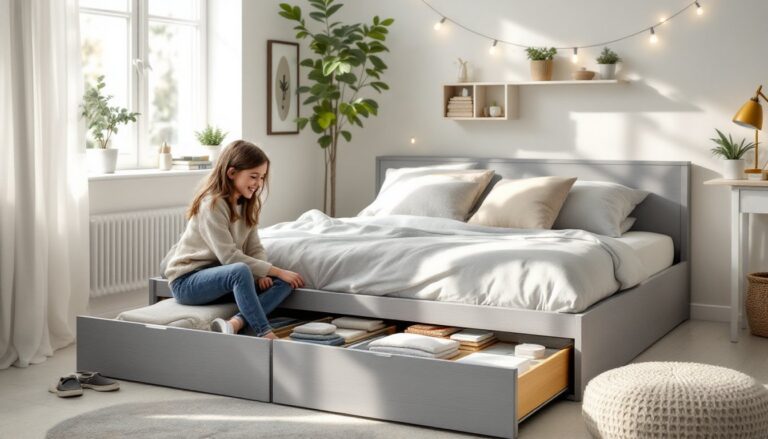
Built-In Bench Seating vs. Standalone Stools
Built-in bench seating looks integrated and maximizes floor space but commits you to one layout. Benches with lift-top hinges store cushions or small items underneath, making them dual-purpose. They’re ideal for families with young children, less tipping than stools. Standalone stools offer flexibility: you can rearrange, add, or remove seating as your life changes. Hybrid setups work too: a bench on one side and two stools on another creates visual interest while maintaining adaptability. Sources like Remodelista’s curated kitchen islands showcase both approaches in real homes. If you go built-in, ensure the seat height aligns with your chosen countertop height to avoid awkward gaps.
Smart Storage Solutions to Maximize Functionality
Storage is the difference between an island that’s cluttered and one that’s calm. Vertical cabinet space on the island sides is cheaper than deep interior shelving. Use a mix of closed cabinets for items you don’t want visible (pot lids, appliance cords) and open shelving for frequently grabbed tools and cookbooks. Drawers are worth the investment, they hold utensils, linens, and small gadgets better than open shelves. Specify full-extension ball-bearing drawers on a 1,500-watt island (or heavier load) to prevent sagging. A 12-inch-deep, 36-inch-wide drawer can hold wine bottles, linens, or everyday plates. Wine coolers or beverage refrigerators fit snugly in a 24-inch-wide cabinet opening, useful for entertaining without heating the kitchen. Open shelving below counters works for baskets, cookbooks, or small plants, but dust settles on stored items, so seal the backs and add doors if possible. Consider toe kicks (a recessed base 4–6 inches tall) so you can stand closer to the island without stubbing your feet. This small detail speeds up work and makes the island feel less bulky. Houzz kitchen islands with seating often feature smart door styles and shelf configurations worth studying for inspiration.
Designing a Layout That Works for Your Kitchen
Island placement is non-negotiable. Center it in the room when possible: offset layouts work in tight spaces but feel awkward for seating. Test the clearance first. Tape the island footprint on your kitchen floor in painter’s tape and walk around it for a day. You’ll quickly spot if 42 inches of clearance feels cramped or if traffic jams occur at appliance openings. Consider the sightline from the kitchen into your dining or living area, an island shouldn’t block conversation between cook and guests. Plumbing and electrical access matter more than people expect. Bringing utilities to an island costs $1,000–3,000 depending on existing lines. A prep sink (18–24 inches) adds $300–800 plus plumbing and venting, but it’s invaluable if the main sink is across the room. A beverage cooler or trash pull-out needs electrical. If your budget is tight, design the island without utilities and stub in lines during installation, it’s cheaper to add later. A standard 36-inch countertop sits at eye level if you’re standing: ensure cooking surfaces (if adding a cooktop) don’t obstruct sightlines to children playing in adjacent rooms. Most codes require a gooseneck faucet (one that swings 180 degrees) if you install a sink, and some jurisdictions require a licensed plumber for supply lines. Check your local building department, kitchen remodels often need permits, especially if you’re moving electrical circuits or plumbing.
Materials and Finishes for Durability and Style
Countertop material sets the island’s tone and lifespan. Quartz (engineered stone) resists stains and scratches better than granite, doesn’t require sealing, and costs $55–120 per square foot installed. Butcher block (solid hardwood) looks warm but needs oil, can stain, and dents under impact, reserve it for islands with light prep use. Laminate ($20–50 per square foot) is budget-friendly but shows wear under daily abuse: it’s fine for an island that’s primarily seating, not food prep. Cabinet bases can be custom cabinetry (highest cost, longest lead time) or semi-custom units from suppliers like IKEA or kitchen cabinet wholesalers (middle cost, 6–12 week lead). Paint quality matters: use cabinet-grade latex or conversion varnish (urethane-based finishes tougher than polyurethane) in satin or semi-gloss. Flat or matte finishes show dust and are harder to clean. If you’re staining wood, test on scrap first, wood species, grain direction, and stain color interact unpredictably. Stainless-steel surfaces are durable but fingerprint-prone: avoid them unless you love polishing. Island bases benefit from a moisture-resistant primer before paint, especially if the island sits on concrete subfloors or near a sink. The Kitchn has thoughtful material comparisons if you’re weighing options. Finish hardware, handles and knobs, should be stainless, brass, or painted steel, not bare aluminum (which oxidizes). Spend $8–20 per handle: cheap hardware loosens within a year.